
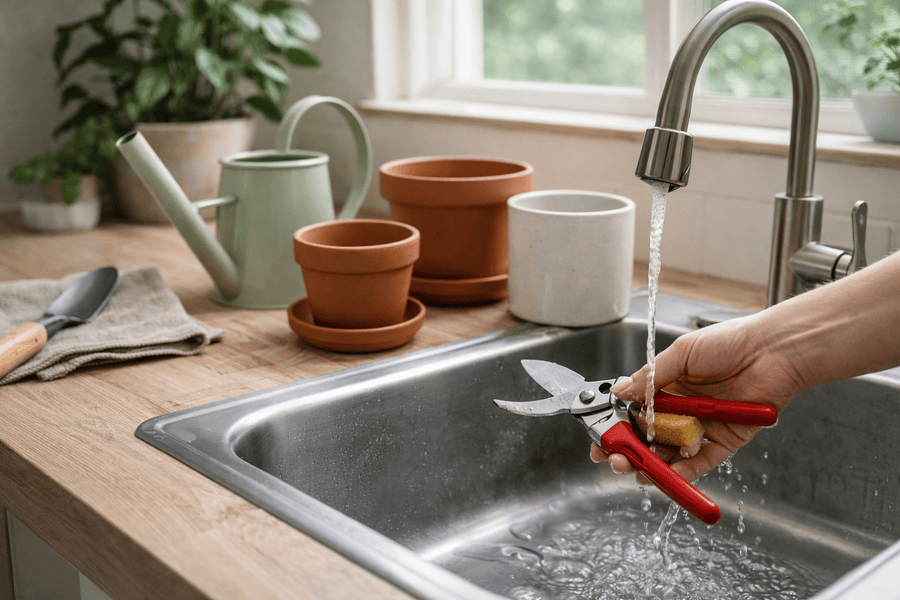
If you reuse pots, saucers, trowels, or pruners (pretty much every indoor gardener does), you’ve probably had this moment: Do I actually need to sterilize this or am I overthinking it?
The honest answer is: not every pot needs a full sterilization routine every single time.
But there are situations where skipping it can quietly spread pests or disease from one plant to the next and you won’t realize it until you’re dealing with the same problem again.
The good news is that learning how to sterilize pots and tools doesn’t have to be intense, harsh, or time-consuming. Most of the time, a simple cleaning is enough. And when sterilizing actually matters, the steps are straightforward.
This guide breaks down when sterilizing is worth doing, what methods work best for indoor gardening, and how to keep your pots and tools plant-safe without going overboard.
📦 What You’ll Learn
- ✅ When pots and tools should be sterilized (and when they don’t need it)
- ✅ The difference between cleaning and sterilizing
- ✅ Beginner-safe sterilizing methods that actually work
- ✅ How to avoid damaging pots or leaving chemical residue
- ✅ Common mistakes that create more problems than they solve
🧠 Cleaning vs Sterilizing: What’s the Difference?
This is the most important idea in the whole post, because it saves you from unnecessary work.
- 🧼 Cleaning removes dirt, old soil, mineral buildup, and organic residue.
- 🧪 Sterilizing disinfects surfaces to kill pathogens and reduce the risk of spreading pests and disease.
If a pot is visibly dirty, you can’t effectively sterilize it without cleaning first. Disinfectants don’t work well through grime, crusty mineral rings, or leftover soil stuck to the sides.
So here’s the simple rule:
Clean first. Sterilize second (only when it matters).
Do You Really Need to Sterilize Pots and Tools?
Not every time. If your plant was healthy and you’re just doing normal repotting, a good cleaning is usually enough.
Sterilizing becomes valuable when there’s a real risk of transfer — meaning you’re worried that something harmful could move from the old pot/tool to a new plant.
✅ Most Beginners Benefit From a “Middle Ground” Approach
If you’re still building confidence (and don’t want to gamble), here’s a practical approach:
- ✅ Always clean pots and tools after use
- ✅ Sterilize when a plant was sick, rotting, or pest-infested
- ✅ Sterilize pruning tools more often (because they can spread issues through plant tissue)
⚠️ When You SHOULD Sterilize Pots and Tools
These are the situations where sterilizing is worth the effort — because the risk of spreading problems is real.
🚨 High-Risk Situations
- After a plant had root rot or consistently soggy soil issues
- After visible mold or sour, swampy soil smells
- After a pest infestation (fungus gnats, mealybugs, scale, etc.)
- Before reusing a pot for a different plant (especially a new purchase)
- When pruning or propagating multiple plants back-to-back
If you’re dealing with root rot concerns, your container setup matters as much as cleaning. This post ties it all together:
How to Prevent Root Rot in Container Plants
🌱 Why This Helps Beginners So Much
Beginners often reuse containers because it’s convenient — and because nobody tells you that “harmless leftovers” can sometimes be where problems restart. Sterilizing in high-risk situations adds a safety buffer while you’re still learning what healthy soil, healthy roots, and healthy watering rhythms look like.
✅ When You Can Usually Skip Sterilizing
Sterilizing everything can become stressful and unnecessary. Here are situations where cleaning is usually plenty.
Low-Risk Situations
- Pots from plants that were healthy and growing well
- Routine watering tools (watering cans, pitchers) that don’t touch soil
- Decorative cache pots that don’t hold soil directly (especially if you keep plants in nursery pots inside)
In these cases, focus on removing buildup and residue. The goal is a clean container system — not a sterile one.
🪴 How to Sterilize Plant Pots Safely (Step-by-Step)
No matter what method you choose, the first two steps are always the same: remove debris and wash first. This is what makes sterilizing actually work.
🧹 Step 1: Dump Old Soil and Remove Debris
Remove all soil, dead roots, and stuck-on plant material. Use a small brush or old toothbrush to get into grooves and drainage holes.
🧼 Step 2: Wash the Pot First
Use warm water and mild dish soap. This removes oils and residue that can block disinfectants.
If the pot has mineral rings (white crusty buildup), a little scrub time matters.
- ✅ Scrub inside and outside
- ✅ Pay attention to drainage holes and rims
- ✅ Rinse well before sterilizing
🧪 Step 3: Choose a Sterilizing Method
The best method depends on the risk level and what your pot is made from. Below are the most beginner-friendly options.
🧴 Option A: Diluted Bleach Solution (Best for Disease Risk)
A diluted bleach soak is one of the most effective ways to disinfect pots when you’re worried about disease or rot.
It’s also easy to mess up if you make it too strong or don’t rinse thoroughly.
- ✅ Use a diluted bleach solution (never full-strength)
- ✅ Soak the pot for a short, controlled time
- ✅ Rinse extremely well afterward
- ✅ Let it fully air dry before use
Beginner tip: if “bleach” makes you nervous, choose hydrogen peroxide for everyday sterilizing and reserve bleach for high-risk situations.
🧂 Option B: Hydrogen Peroxide (Great for Light Sterilizing)
Hydrogen peroxide is popular because it’s easier to handle than bleach and breaks down into water and oxygen. It’s a good choice when your goal is general sanitizing rather than “nuke everything.”
- ✅ Good for routine pot reuse and light risk situations
- ✅ Helpful for porous pots where residue can linger
- ✅ Still requires cleaning first to work properly
🌞 Option C: Hot Water + Thorough Drying (Low-Risk, No Chemicals)
If the pot came from a healthy plant and you just want a safer reset, hot water and a good scrub, followed by full drying, is often enough.
- ✅ Best when there was no disease or pest issue
- ✅ Works well for sturdy plastic pots and trays
- ⚠️ Not ideal if you suspect rot, fungus, or pests
⚱️ Special Considerations by Pot Material
⚱️ Terracotta and Unglazed Clay
Terracotta is porous, which is great for airflow but means it can absorb residue. It often benefits from longer soaking and extra thorough rinsing.
- ✅ Scrub well inside the pot
- ✅ Pay attention to mineral buildup
- ✅ Let it dry fully before reuse (porous pots hold moisture longer)
🧱 Plastic and Glazed Ceramic
These are the easiest to sterilize because residue doesn’t soak in. They rinse clean and dry quickly.
- ✅ Quick scrub + disinfect + rinse usually does the job
- ✅ Great for beginners who want predictable watering systems
🧺 Fabric Pots
Fabric pots are tricky because they hold onto fine soil particles. Most of the time, thorough cleaning is the practical solution.
If a fabric pot was involved in disease or heavy pests, replacing it is often the simplest route.
🧰 How to Sterilize Gardening Tools
Tools are different than pots because tools can spread problems directly through plant tissue. A dirty pot affects the root environment; a dirty pruner can transfer issues plant-to-plant in seconds.
✂️ Tools That Should Be Sterilized Regularly
- Pruners and scissors
- Knives used for propagation or dividing plants
- Soil scoops and trowels (especially if you move between pots)
🧪 Simple Tool-Sterilizing Methods
- ✅ Alcohol wipes or alcohol spray on blades (fast and easy)
- ✅ Hydrogen peroxide wipe/spray for general sanitizing
- ✅ Diluted bleach for high-risk cases (then rinse and dry)
Beginner tip: keep a small container of alcohol wipes near your plant area. If you prune regularly, this tiny habit prevents a lot of headaches.
❌ Common Sterilizing Mistakes to Avoid
Sterilizing is meant to reduce problems — but certain mistakes can cause new ones (like chemical residue, damaged pots, or stressed roots).
❌ Mistake 1: Skipping the Cleaning Step
Disinfectants work best on clean surfaces. If the pot still has soil residue stuck to it, sterilizing becomes much less effective.
❌ Mistake 2: Using Overly Strong Chemical Solutions
More isn’t better. Strong chemical concentrations can leave residue and degrade materials over time. Follow a gentle, controlled approach.
❌ Mistake 3: Not Rinsing Thoroughly
This is the big one. If you sterilize with bleach (or any disinfectant), rinse extremely well and let pots air dry fully before adding soil. Chemical residue can stress roots and damage new growth.
❌ Mistake 4: Sterilizing Everything All the Time
Indoor gardening doesn’t require a sterile environment. Over-sanitizing can become a time sink and can even encourage anxiety around normal plant care.
Use sterilizing as a tool — mainly for high-risk situations.
🧠 A Simple Routine That Works for Most Indoor Gardeners
If you want a simple approach you can actually stick to, try this:
- ✅ After normal repotting: scrub pots with soap + warm water, rinse, dry.
- ✅ After pests/rot: clean first, then sterilize (bleach or peroxide), rinse, dry.
- ✅ When pruning multiple plants: wipe tools between plants.
This routine covers most real-world scenarios without turning sterilizing into a big production.
FAQs About How to Sterilize Pots and Tools
Do I need to sterilize pots every time I repot?
Not usually. If the plant was healthy and the pot cleans up well, washing with soap and warm water is typically enough. Sterilize when you’re reusing pots after disease, pests, or root rot.
Is bleach safe for plant pots?
Yes, when used in a diluted solution and rinsed thoroughly. Bleach is most useful when you suspect disease or rot, but you should avoid using it full-strength and always let the pot fully dry before reuse.
Can I sterilize pots in the dishwasher?
Sometimes. Small plastic pots and non-porous items may tolerate a hot wash, but heat can warp certain plastics, and terracotta can break or shed residue. Dishwashers also aren’t ideal for heavily soiled pots unless you scrub them first.
What’s the easiest way to sterilize pruning tools?
For most indoor gardeners, alcohol wipes or an alcohol spray on blades is the easiest method. Wipe between plants when pruning, especially if you’re dealing with pests or suspicious damage.
🌱 Conclusion: Sterilizing Helps — But It’s Not a Lifestyle
Sterilizing pots and tools is about reducing risk, not creating a sterile home. If you clean consistently and sterilize when it actually matters (pests, disease, rot, and multi-plant pruning), you’ll prevent a lot of repeat problems without turning plant care into a chore.
For most beginners, the biggest wins come from simple habits: clean pots, drain well, and avoid keeping soil constantly wet. Those fundamentals do more for plant health than any extreme disinfecting routine.
If you’re reusing old soil, this is a perfect next read so your container system stays healthy:
How to Refresh and Reuse Potting Mix the Right Way

👋 About the Author
Steve is the creator of Indoor Gardening Essentials and a hands‑on indoor gardener with years of experience growing plants in small apartments, tight corners, and low‑light spaces.
He specializes in practical, beginner‑friendly setups—from kitchen herbs and windowsill succulents to self‑watering planters, terrariums, and simple hydroponic systems. Everything he teaches comes from real experimentation, not guesswork.
Steve documents his projects, successes, and occasional failures on his YouTube channel Small Farms Big Ideas , where he tests grow lights, soil mixes, watering routines, and small‑space gardening methods.
His goal is simple: help new indoor gardeners build confidence, avoid common mistakes, and grow healthy plants—no matter how small their space is.