
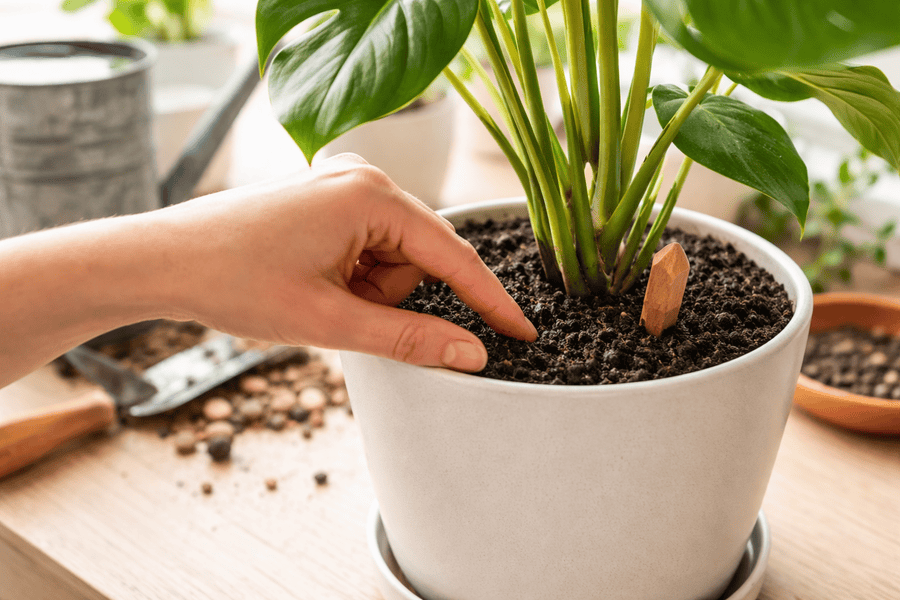
If your pot is staying wet for days, you’re not imagining it — and you’re not alone. If you’re trying to fix poor drainage without repotting, you’re not alone.
This is one of those indoor plant problems that can sneak up on you: everything looks “fine”… until the soil starts holding water like a sponge and your plant suddenly looks tired, droopy, or a little yellow.
The tricky part? A lot of people assume it’s just overwatering. But sometimes the real issue is that the container (or the soil inside it) isn’t letting water move through the way it should.
And if you’re thinking, “Great… do I have to repot this thing right now?” — usually, no. In many cases you can do a quick rescue that helps the soil dry out faster and prevents bigger problems, without pulling the plant out and disturbing the roots.
This guide walks you through the safest fixes first (the ones that help immediately), then the smarter “stabilize now, improve later” steps that keep your plant from sliding into root trouble.
If you’re also using saucers or drip trays, this pairs well with:
Saucers & Drip Trays: How to Protect Floors Without Root Rot.
📦 What You’ll Learn
- ✅ How to tell if poor drainage is the real issue (not just “too much water”)
- ✅ Fast ways to remove extra moisture without pulling the plant out
- ✅ How to improve airflow and drainage from the bottom of the pot
- ✅ Safe “quick fixes” vs the signs you actually need to repot
- ✅ What to do differently next time so this doesn’t keep happening
🚦 First: How to Tell If Poor Drainage Is the Problem
Before you start doing fixes, it helps to make sure you’re treating the right problem. Poor drainage usually shows up as water that goes in… and doesn’t really come out.
Here are the most common signs:
- 💧 The soil still feels wet 3–5+ days after watering (even in a warm room)
- 💧 Water sits on top of the soil for a while before soaking in
- 💧 The pot feels heavy long after watering
- 👃 A musty or “basement” smell comes from the pot
- 🍃 Lower leaves yellow slowly, and stems feel softer than usual
A key detail: you can have “poor drainage” even if your pot has drainage holes. It happens when:
- 🧱 The soil is compacted and water can’t move through it
- 🪴 The pot is too large, so the middle stays wet forever
- 🚫 Drainage holes are blocked by roots, salt buildup, or soggy soil
- 🪣 The pot sits in a saucer of water and re-absorbs moisture
If your plant is bone-dry and droopy, this isn’t the guide you need. But if you’re dealing with slow-drying soil and that “stuck wet” feeling, you’re in the right place.
🧻 Quick Rescue Step #1: Remove Standing Water (Safely)
If there’s water sitting in a saucer, decorative cache pot, or tray, start there. Standing water is like hitting “rewet” on the soil over and over.
✅ Empty the saucer and let the pot breathe
- 🟦 Dump any collected water right away (don’t “save it for humidity” — it backfires fast)
- 🟦 If your pot sits inside a decorative cover pot, pull it out and let it drain in the sink
- 🟦 Set the pot on a folded towel or a rack for 30–60 minutes so it can drip freely
✅ The gentle tilt method (for water trapped at the bottom)
Sometimes water collects in the lower soil and can’t find an exit. A safe trick is to tilt the pot slightly and let gravity help.
- ➡️ Hold the pot steady and tilt it just enough so the drainage holes are lower than the soil line
- ➡️ Let it sit tilted for a few minutes (use a towel under it)
- ➡️ If water drips out, great — that’s moisture you want gone
Avoid shaking the plant or squeezing the pot hard (especially with fragile roots). You’re trying to help water leave — not stress the plant into shock.
🕳️ Quick Rescue Step #2: Fix Bottom Drainage Without Repotting
Next, make sure the bottom of the pot can actually do its job. A lot of “drainage problems” are really “the pot can’t breathe” problems.
✅ Check for blocked drainage holes
- 🔎 Look under the pot — are the holes covered by soggy soil or mineral crust?
- 🔎 If roots are growing out of the holes, that can slow drainage too
- 🧼 If you can, gently clear the hole area with a chopstick or skewer (no digging deep)
✅ Add airflow under the pot (this helps more than people think)
If the pot sits flat on a surface, the bottom stays damp longer. Lifting it slightly helps water evaporate and encourages better drainage.
- 🪵 Use pot feet, a thin trivet, or even a spare upside-down saucer as a spacer
- 🌬️ Make sure air can move underneath (especially for plastic pots)
- 🧺 If it’s in a decorative cover pot, leave it out for a day while things dry
Next, we’ll get into safe ways to speed drying (without “cooking” your plant), plus how to deal with compacted soil and wicking tricks that pull moisture out fast.
🌬️ Quick Rescue Step #3: Help the Soil Dry Faster (Without Hurting the Plant)
Once excess water is removed, the next goal is helping the remaining moisture leave the pot at a healthy pace. This is where small environmental tweaks make a big difference.
✅ Improve air circulation around the pot
Still air slows evaporation. You don’t need a wind tunnel — just gentle movement.
- 🌬️ Place the plant where air naturally moves (near, not in, a walkway or vent)
- 🌬️ Use a small fan across the room, not blowing directly on the plant
- 🌬️ Avoid corners where air feels “stale”
This helps moisture leave the soil surface and prevents that swampy feeling from lingering.
✅ Light adjustments (gentle is the key word)
Light encourages water use — but sudden bright sun can stress a plant that’s already struggling.
- ☀️ Move the plant slightly closer to its usual light source (not full sun if it wasn’t there before)
- ☀️ Avoid drastic changes like moving from low light to a south-facing window overnight
- ☀️ Think “a little brighter than before,” not “maximum brightness”
If you’re unsure, err on the side of slow adjustments. Drying soil too aggressively can cause leaf drop.
🪵 Quick Rescue Step #4: Fix Soil Compaction From the Top
Sometimes drainage problems aren’t about water volume at all — they’re about compacted soil. When soil gets dense, water has nowhere to go.
🚩 Signs your soil is compacted
- 🧱 Water pools on the surface before soaking in
- 🧱 The soil feels hard or crusted when dry
- 🧱 Roots seem slow to recover even when watering improves
✅ Loosen the top layer safely
You don’t need to dig deep — disturbing roots can make things worse. Focus on the upper inch.
- 🥢 Use a chopstick, skewer, or pencil
- 🥢 Gently wiggle straight down, stopping if you feel resistance
- 🥢 Space holes a few inches apart — don’t turn the soil
This creates tiny air channels that help moisture move downward instead of sitting on top.
⚠️ What to avoid
- ❌ Stirring the entire pot like a mixing bowl
- ❌ Digging deep around the stem
- ❌ Forcing tools through thick resistance
🧻 Quick Rescue Step #5: Use Wicking to Pull Moisture Out
Wicking is one of the most underrated fixes for soggy soil. It works by giving water an easier path out of the pot — without disturbing the roots.
✅ Paper towel or cloth wick method
This works especially well for plastic pots and peat-heavy mixes.
- 🧻 Roll a paper towel or use a strip of cotton cloth
- 🧻 Gently tuck one end into a drainage hole (just a little)
- 🧻 Let the rest hang below the pot into open air or a dry towel
Leave it in place for a few hours or overnight. The wick pulls excess moisture downward naturally.
⏱️ How long to wick
- ⏳ Lightly soggy soil: 2–4 hours
- ⏳ Heavily saturated soil: overnight
- ⏳ Check in the morning and remove once the soil feels damp, not wet
⚠️ Wicking mistakes to avoid
- ❌ Leaving the wick in permanently (this over-dries later)
- ❌ Packing fabric tightly into the hole
- ❌ Using synthetic fabric that doesn’t absorb water
This is a temporary rescue — not a long-term setup — but it can make a big difference fast.
🚿 Adjust Watering After the Rescue (So the Problem Doesn’t Bounce Back)
Once the soil starts drying normally again, watering habits matter just as much as drainage.
✅ Skip full waterings for now
- 🚫 Don’t water again just because “it’s watering day”
- 🚫 Wait until the top few inches actually dry
✅ Use partial watering instead
When you do water again, use less than normal. Think supporting recovery, not soaking the pot.
- 💧 Water slowly
- 💧 Stop as soon as water reaches the bottom
- 💧 Empty saucers after 10–15 minutes
Bottom watering can help some plants — but if drainage is already poor, it can trap moisture longer. Use it cautiously until the issue is fully resolved.
Next, we’ll cover the reality check: which fixes are temporary, when drainage problems mean repotting is unavoidable, and how to tell if root damage has already started without panicking or guessing.
⏳ Temporary Fixes vs Real Solutions (Set the Right Expectations)
The steps you’ve taken so far can make a huge difference — but it helps to be honest about what they’re designed to do.
These fixes are meant to stabilize the situation: slow down damage, help roots breathe again, and give your plant time to recover. They don’t magically change the soil structure forever.
✅ What these quick rescues are great for
- 🛟 Preventing root suffocation after accidental overwatering
- 🛟 Helping compacted soil dry more evenly
- 🛟 Buying time until you can repot safely
- 🛟 Reducing stress during colder months or low-light periods
⚠️ What they can’t fix permanently
- ❌ Old, broken-down potting mix that holds water no matter what
- ❌ Pots that are far too large for the root system
- ❌ Containers with no drainage (unless used as cache pots)
- ❌ Advanced root rot
Think of these steps as a smart pause button — not a full reset.
🪴 Plants That Handle Temporary Drainage Fixes Better (and Worse)
Some plants are more forgiving than others when it comes to soggy soil. Knowing where yours falls helps you decide how urgent the situation really is.
🌱 More tolerant of short-term drainage issues
- ✔️ Pothos
- ✔️ Philodendron
- ✔️ Peace lily (ironically dramatic, but resilient)
- ✔️ Chinese evergreen (Aglaonema)
- ✔️ Ferns (as long as they’re not cold)
🌵 Less forgiving — act faster with these
- ⚠️ Succulents and cacti
- ⚠️ Snake plants in low light
- ⚠️ ZZ plants in oversized pots
- ⚠️ Woody-stemmed plants
If your plant falls into the second group, treat these fixes as very short-term and monitor closely.
🚨 When Repotting Is No Longer Optional
Sometimes the right call really is repotting — even if it’s inconvenient. The key is knowing when you’ve crossed that line.
🚩 Signs it’s time to repot (even if you were hoping not to)
- 🚩 Soil stays wet more than a week after all fixes
- 🚩 A sour or rotten smell keeps returning
- 🚩 Leaves continue yellowing or dropping despite drying efforts
- 🚩 Roots look brown, mushy, or stringy near drainage holes
If you reach this point, repotting isn’t a failure — it’s plant triage.
Before you do, it’s smart to clean and prep your supplies properly. This guide pairs well here:
How to Sterilize Pots and Tools.
🧠 How to Prevent Drainage Problems Next Time
Once your plant is stable again, a few small changes can keep this from becoming a repeat problem.
- 🪴 Choose pots sized to the root ball — not the plant’s leaf spread
- 🪴 Make sure drainage holes stay clear
- 🪴 Empty saucers after watering (especially indoors)
- 🪴 Replace potting mix every 12–18 months for most houseplants
- 🪴 Adjust watering to the season, not the calendar
If floor protection is part of the issue, this guide fits naturally with everything you’ve learned here:
Saucers & Drip Trays: How to Protect Floors Without Root Rot.
🌿 Conclusion: Fix What You Can, When You Can
Poor drainage is one of the most common indoor plant problems — and it’s rarely caused by a single mistake. Pots, soil, watering habits, and home conditions all play a role.
The good news is that you don’t always have to act immediately or tear everything apart. With the right quick fixes, you can stabilize your plant, give the roots air again, and decide the next step calmly — not reactively.
If you want a solid foundation that ties drainage, watering, and light together, start here:
Indoor Plant Care Basics.
Sometimes saving a plant is about doing less — just doing it at the right time.
Containers and Systems Ideas for Small Gardens: Sure Fire Tips
❓ How to Fix Poor Drainage Without Repotting FAQs
Can poor drainage be fixed without repotting?
Yes, in many cases poor drainage can be improved without repotting. Removing standing water, improving airflow under the pot, loosening compacted topsoil, and using wicking techniques can help excess moisture leave the container and give roots time to recover. These methods work best as temporary or stabilizing fixes.
How long should soil stay wet after watering indoor plants?
For most indoor plants, the soil should begin drying within 2–4 days after watering. If the soil remains wet for more than 5–7 days, it often points to poor drainage, compacted soil, or an oversized container rather than simple overwatering.
Is it safe to poke holes in the soil to improve drainage?
Yes, gently loosening the top inch of soil can help improve airflow and drainage. Using a chopstick or skewer to create small air channels allows moisture to move without disturbing the root system, as long as deep digging and forcing tools through resistance are avoided.
Does lifting a pot help with drainage?
Yes. Elevating a pot slightly allows air to circulate underneath, which helps moisture evaporate faster and prevents water from lingering at the bottom of the container.
What is wicking and how does it help soggy soil?
Wicking uses absorbent material, such as a paper towel or cotton cloth, to pull excess water out through the drainage holes. It gives trapped moisture an easier exit path and works best as a short-term rescue method. Wicks should be removed once the soil feels damp rather than wet.
Can I use bottom watering if my plant has drainage problems?
Bottom watering is not ideal when drainage is already poor because it can keep the lower soil too wet for too long. Until drainage improves, top watering with reduced volume is usually the safer option.
When is repotting unavoidable for poor drainage?
Repotting is usually unavoidable if the soil stays wet for more than a week despite drainage fixes, if a sour or rotten smell persists, or if roots appear brown and mushy. At that point, fresh soil and proper drainage are needed to prevent further root damage.

👋 About the Author
Steve is the creator of Indoor Gardening Essentials and a hands‑on indoor gardener with years of experience growing plants in small apartments, tight corners, and low‑light spaces.
He specializes in practical, beginner‑friendly setups—from kitchen herbs and windowsill succulents to self‑watering planters, terrariums, and simple hydroponic systems. Everything he teaches comes from real experimentation, not guesswork.
Steve documents his projects, successes, and occasional failures on his YouTube channel Small Farms Big Ideas , where he tests grow lights, soil mixes, watering routines, and small‑space gardening methods.
His goal is simple: help new indoor gardeners build confidence, avoid common mistakes, and grow healthy plants—no matter how small their space is.