

Growing microgreens indoors is one of the fastest, easiest ways to start indoor gardening. With just a few basic supplies, you can enjoy quick, tasty harvests right from your kitchen—making it a perfect starting point for beginners who want fresh, homegrown greens year-round.
If you’ve been curious about how to grow microgreens indoors, you’re in the right spot.
These tiny greens don’t need much room, time, or effort, and once you try your first tray, you’ll see why so many beginners get hooked.
You can start with a few simple supplies, a bit of light, and a couple minutes a day—and before you know it, you’ll be cutting your first fresh harvest right in your kitchen.
What You’ll Learn 🥗
💡 The best beginner-friendly varieties to start with
🪴 Easy setup tips for trays, soil, and lighting
💧 How to water microgreens the right way and avoid mold
⏱️ When to harvest and how to keep a steady supply year-round
❗ Simple fixes for common issues like legginess or uneven growth
🍽️ Fun ways to use your fresh homegrown microgreens
👤 Who This Is For
This guide is for anyone who wants to grow microgreens indoors without complicated setups, special equipment, or gardening experience.
It’s especially helpful if you:
- Are new to indoor gardening and want a fast, confidence-building win
- Live in an apartment or small space with limited light
- Want something you can grow and harvest in under two weeks
- Are tired of buying expensive microgreens at the store
- Don’t want to deal with grow lights, fertilizers, or complex systems
If you’re looking for a simple, beginner-friendly way to grow fresh greens indoors using basic supplies and minimal space, this guide will walk you through exactly what to do — and what to skip.
How to Grow Microgreens Indoors: Step-by-Step Beginner Guide 🌱
If you’ve ever wished you could harvest something fresh without dedicating a whole room—or waiting months—microgreens might just become your new favorite indoor crop.
These little greens grow fast, taste amazing, and brighten up even the smallest kitchen countertop.
And the best part? You don’t need fancy lights, expensive trays, or tons of experience. You can start today and enjoy your first harvest in about a week.
Let’s walk through everything step-by-step, beginner style.
🌿 What Are Microgreens (And Why Are They So Popular)?
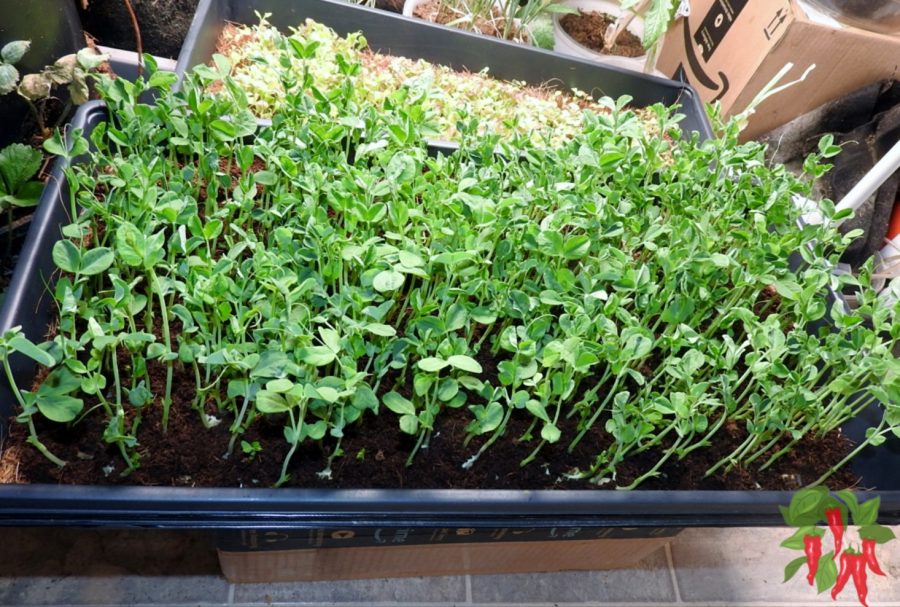
Microgreens are the young seedlings of vegetables and herbs—think broccoli, kale, arugula, radish, or pea shoots—harvested when they’re just a couple inches tall. They’re not sprouts (which are grown in water), but tiny, leafy plants grown in soil or a growing medium.
People love them because:
- 🌱 They grow super fast (7–14 days for most varieties)
- ✨ They pack huge flavor in a tiny bite
- 💪 They’re nutrient-dense compared to mature greens
- 🪟 They fit anywhere — a windowsill, shelf, counter… even a shoebox works
- 🧂 They add crunch, color, and pep to meals
- 🔁 They’re fun for beginners because you see results fast
If you’re new to indoor gardening, microgreens are one of the easiest and most rewarding places to start.
Indoor Gardening Beginner Guides
🧰 What You Need to Grow Microgreens Indoors
You only need a handful of simple supplies — nothing complicated:
⭐ Tools & Materials
- Microgreen-friendly seeds: broccoli, radish, peas, kale, mustard, basil, etc.
- Shallow tray (1–2″ deep) with drainage
- Growing medium: seed starting mix, coco coir, or a sterile soilless blend
- Spray bottle for gentle watering
- A humidity dome or plastic cover (optional but helpful)
- Light source: bright window or a small LED grow light
- Scissors for harvesting
- A small fan (optional for airflow)
Bonus tip: I like to use commercial 10-20 seed flats, but you can recycle clean produce containers or takeout trays, and they make great microgreen trays for smaller spaces.
Indoor Setup & Container Guides
🌱 Step-by-Step: How to Grow Microgreens Indoors
This is the part beginners love — the process is quick, simple, and super satisfying.
🥇 Step 1: Choose Your Microgreen Seeds
You can grow tons of different microgreens. Some great beginner-friendly options include:
- 🌶️ Radish — quick, spicy, super easy
- 🥬 Broccoli — mild flavor, very popular
- 🌱 Arugula — peppery and fast
- 🫘 Peas — sweet, crunchy stems
- 🌻 Sunflower — nutty and hearty
- 🧅 Onion/garlic chives — great aroma
Avoid microgreens from nightshade plants such as tomatoes, peppers, and eggplants. Their foliage contains compounds you shouldn’t eat.
Choose More Easy Indoor Crops
🪴 Step 2: Prep Your Tray (Choose the Best Indoor-Friendly Medium)
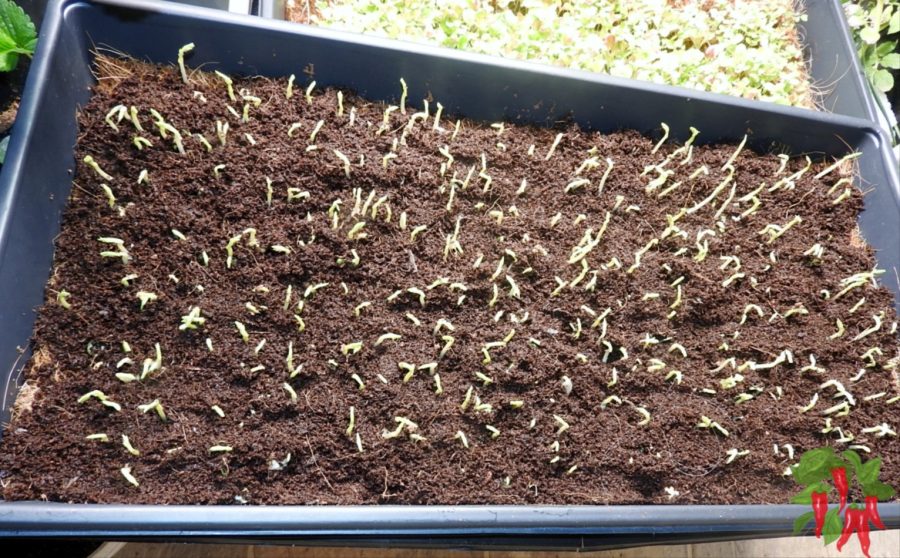
Getting your tray ready is quick, but a few smart choices here make the whole grow go smoother—especially indoors, where mess and mold can become headaches.
- Fill your tray with 1–1.5 inches of damp growing medium.
You want it moist like a wrung-out sponge, not sopping wet. - Choose coco coir for best results.
If you’re starting seeds indoors, coco coir is one of the easiest and cleanest options you can use.
It offers:- Even moisture retention
- Excellent drainage
- Better mold resistance than peat
- A loose texture that helps roots grow freely
- A renewable, peat-free alternative
Most beginners find microgreens sprout thicker and more evenly in coir compared to peat-based mixes.
- Prefer peat-free? Coco coir is the go-to.
Peat can work, but it compacts, breaks down quickly, and tends to stay wetter than microgreens prefer. Coco coir is more forgiving and ideal for fast-growing seedlings. - Want a cleaner indoor setup? Try coco grow mats.
If you don’t want loose soil indoors, coco grow mats (or other soilless pads) are a great option:- Cleaner harvesting
- Even germination
- Easy to cut to fit your tray
- Minimal mess on counters and shelves
- Simple to toss and replace after each harvest
- Level your medium.
Use your hand to flatten the surface so the seeds germinate evenly. - Don’t reuse your grow medium.
Microgreens leave behind dense roots that break down and invite mold. Start fresh each time for clean, predictable indoor growing.
🌧️ Step 3: Sow the Seeds (Densely!)
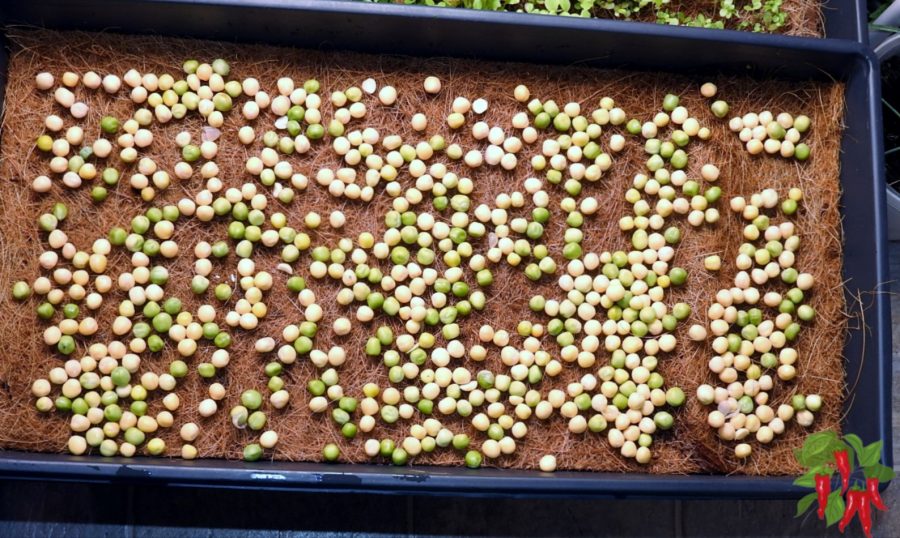
Microgreens are grown close together on purpose. Sprinkle your seeds evenly across the entire surface like you’re seasoning a pan.
- Don’t bury most varieties; just lightly press them into the soil.
- Larger seeds like peas or sunflower can be lightly covered.
- Mist them gently until the surface is evenly moist.
🌑 Step 4: Germinate in the Dark
Most microgreens germinate best without light:
- Cover the tray with a humidity dome or inverted tray.
- Keep them warm — around 65–75°F.
- Check daily and mist if the top dries out.
You’ll see tiny sprouts in 2–4 days depending on the variety.
💡 Step 5: Move Them Into the Light
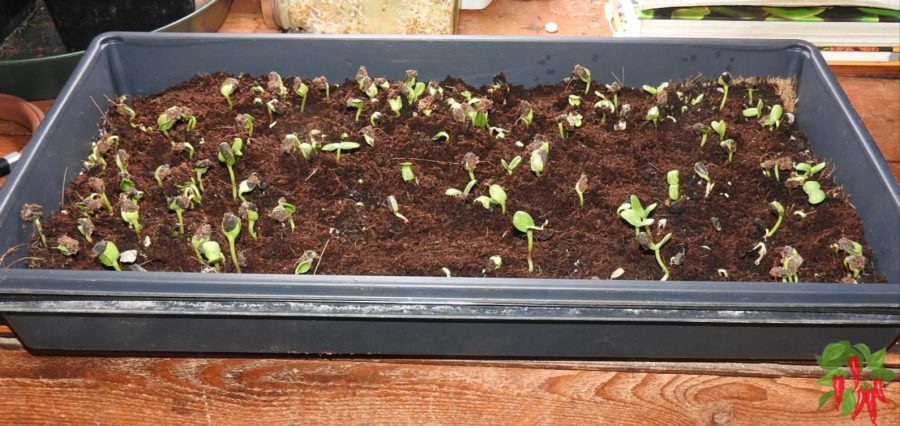
Once the seeds sprout, it’s time for sunshine (or artificial light):
- Move the tray to a bright window OR
- Place a small LED grow light 6–12 inches above the tray
Light prevents “legginess” and keeps microgreens sturdy.
Lighting checklist:
- 🌤️ 4–6 hours of direct sun OR
- 🔆 12–16 hours under a grow light
- 🔄 Rotate trays if sunlight is uneven.
- 🌀 Add a small fan nearby to prevent mold.
Indoor Plant Lighting Guides
💧 Step 6: Water Carefully (The #1 Beginner Challenge)
Microgreens love moisture — but not soaking. Water from the bottom if possible:
- Place your tray inside a second tray with an inch of water.
- Let the soil soak up what it needs.
- Remove after 10–15 minutes.
Top watering works too if you mist gently and avoid flooding.
Signs you’re over-watering:
- Mushy stems
- Sour smell
- Mold patches
Signs you’re under-watering:
- Droopy, thin microgreens
- Dry, pale soil surface
- Leaves losing color
Watering & Plant Care Guides
✂️ Step 7: Harvest Your Microgreens
The best moment! 🎉
Most microgreens are ready in 7–14 days, depending on the seed type. Look for:
- Two little “baby leaves”
- One or two “true leaves” (optional depending on taste)
- Vibrant color
- Crisp stems
To harvest:
- Hold a small clump between your fingers.
- Snip just above the soil line.
- Avoid pulling — soil flakes will follow you around the kitchen.
Rinse gently and pat dry. They store best wrapped in a dry paper towel in the fridge for 3–5 days.
Ready for Bigger Indoor Harvests?
🛠️ Troubleshooting: Avoid These Beginner Mistakes
Growing microgreens is easy once you learn a few tricks. If something seems off, here’s what might be happening:
⚠️ Mold / White Fuzz
Common causes:
- Not enough airflow
- Over-watering
- No drainage
- Too much humidity
Fix: Add a fan, reduce watering, ensure drainage holes, and uncover sooner.
⚠️ Leggy Microgreens
The stems are too long, floppy, or pale.
Why: Not enough light.
Fix: Raise your light or add a second source.
⚠️ Uneven Growth
One corner grows faster than the other.
Fix: Rotate trays daily or adjust your lighting angle.
⚠️ Slow Growth
Often caused by low temperatures.
Fix: Keep the tray above 65°F and avoid drafty windows.
🍽️ Fun Ways to Use Your Microgreens
Once you start growing them, you’ll put microgreens on everything:
- 🌯 Wraps, sandwiches & tacos
- 🥗 Salads
- 🍳 Eggs, omelets & avocado toast
- 🍲 Garnish for soups & bowls
- 🧄 Blended into dressings or pesto
- 🧆 Veggie bowls for texture and flavor
They’re also a great beginner gift for friends who want to “try an indoor garden without killing anything.”
More Indoor Growing Ideas
❓ FAQs: Growing Microgreens Indoors
How long do indoor microgreens take to grow?
Most microgreens grow in 7–14 days, depending on the variety.
Do microgreens need grow lights?
A bright window works, but a small LED grow light gives more consistent results, especially in winter.
Can I grow microgreens in any container?
Yes — as long as it’s clean, shallow, and has drainage holes.
How often should I water microgreens?
Keep the soil lightly moist — usually daily misting or bottom-watering.
Can I reuse the soil?
Reuse the tray, but use fresh growing medium each time.
Are microgreens healthier than mature greens?
They’re often richer in certain nutrients per ounce.
Are sprouts the same as microgreens?
No — sprouts grow in water; microgreens grow in soil or a medium and are harvested as small plants.
What seeds should I avoid?
Skip nightshades: tomatoes, peppers, eggplants.
🎉 Conclusion
Growing microgreens indoors is one of the easiest, quickest, and most rewarding ways to dip your toes into indoor gardening.
You don’t need a big setup or complicated equipment — just a tray, some seeds, a bit of light, and a few minutes a day.
Once you get the hang of it, you can run continuous harvests year-round.
And few things feel as good as sprinkling your home-grown greens onto dinner and thinking, “Yep… I grew that.” 🌱😉
Give it a try this week — set up your first tray, watch those tiny sprouts pop up, and before you know it, you’ll be harvesting like a pro.
👉 What to Grow: Best Plants for Your Indoor Space
Keep Growing Food Indoors
📚 References (.edu sources)
- University of Illinois Extension – Small but Mighty: Microgreens Are Easy to Grow Indoors
- Mississippi State University Extension – Grow Microgreens Inside for Fresh Winter Produce
- Penn State Extension – A Step-by-Step Guide for Growing Microgreens at Home
- Colorado State University Extension – Growing Microgreens (PDF)
- South Dakota State University Extension – Growing Microgreens at Home

👋 About the Author
Steve is the creator of Indoor Gardening Essentials and a hands‑on indoor gardener with years of experience growing plants in small apartments, tight corners, and low‑light spaces.
He specializes in practical, beginner‑friendly setups—from kitchen herbs and windowsill succulents to self‑watering planters, terrariums, and simple hydroponic systems. Everything he teaches comes from real experimentation, not guesswork.
Steve documents his projects, successes, and occasional failures on his YouTube channel Small Farms Big Ideas , where he tests grow lights, soil mixes, watering routines, and small‑space gardening methods.
His goal is simple: help new indoor gardeners build confidence, avoid common mistakes, and grow healthy plants—no matter how small their space is.